 EN
 IT Italiano
 ES Español
 FR Français
 DE Deutsch
Description
What it is
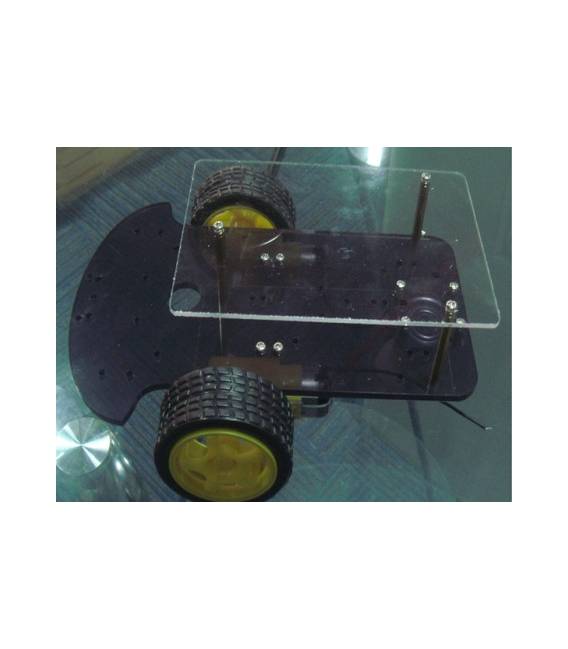
The two-level frame for Smart Car is a fundamental component for the realization of robotic and intelligent vehicle projects. This frame offers a solid base on which to position motors, sensors, and other components necessary for the construction of robotic toy cars.
Features
- Two-Level Frame for Smart Car
- Developed for electronic and robotic projects
- Ideally suited for both beginners and experts
What it is for
This frame is used for the construction of robotic vehicles such as smart cars or rovers. It is possible to create a simple model that moves in a straight line and avoids obstacles thanks to position sensors. The project takes approximately 30 minutes.
Tutorial: How to Use the Two-Level Frame for Smart Car
The two-level frame is a crucial component for building robotic toy cars or smart cars. Ideal for both beginners and more experienced makers, this frame offers a solid structure on which to mount motors and other necessary components.
What you need
- Arduino Uno
- DC Motors
- Position Sensors
- 3.7V Battery or equivalent
- JST Connectors
- Connection Strips
Steps
- Check that all listed components are present and in the correct state of charge.
- Connect the battery to the frame following the instructions in the datasheet.
- Mount the DC motors at the designated points on the frame, ensuring a snug but not overly tight fit.
- Connect the Arduino module to the frame interface using connection strips or JST cables.
- Connect the position sensors to the motors and the main circuit following the specifications in the datasheet.
- Check all connections to ensure there are no short circuits or incorrect connections.
- Upload the Arduino sketch to the module using the example code provided below.
- Test the smart car in a safe and controlled environment.
Example code
void setup() {
  Serial.begin(9600);
}

void loop() {
  // Inserire qui il codice per gestire i motori e i sensori
}
Mini project
Build a simple smart car that moves in a straight line, avoiding obstacles thanks to the position sensors. The project should take approximately 30 minutes.
Common mistakes
- Incorrect connections or connection interruptions
- Battery not adequately charged
- Motors mounted incorrectly
Recommended accessories
- Arduino Uno R3
- Position sensors HC-SR04
- Adafruit connection strips
- JST-XH 2 pole connectors
Frequently asked questions
How can I upload the sketch to Arduino?
Use the Arduino IDE software to upload the code to the module.
What is the battery life?
The duration depends on the capacity of the battery used. Check the datasheet.


Reviews
There are no reviews yet.