 EN
 IT Italiano
 ES Español
 FR Français
 DE Deutsch
Description
What it is
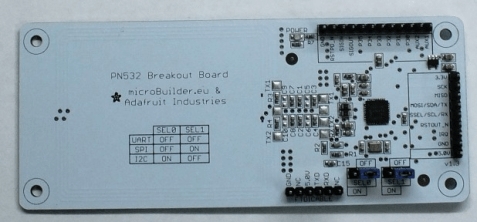
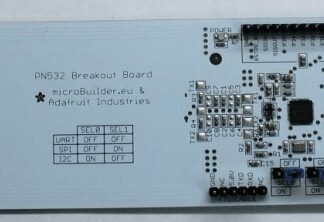
This screen is designed to be used with RFID/NFC/PN532 boards. It allows you to display information related to the RFID/NFC device, making it useful for projects that require a visual user interface.
Features
- Compatible with RFID/NFC/PN532 boards
- RFID and NFC Support
What it is for
This screen is ideal for electronic security projects and user interfaces. You can use it to display information such as the username in an RFID/NFC-based access control system. Compatibility with Arduino and ESP can be verified in the datasheet.
Using the PN532 Screen
The PN532 Screen allows you to display information related to your RFID/NFC device. Useful for projects that require visual interaction with the user.
What you need
- PN532 Screen
- Arduino
- USB Cable
- PN532 Board
Steps
- 1. Installation: Download and install the latest version of the Arduino IDE software.
- 2. Connection: Connect the PN532 board to your Arduino using pins D10, D11, D12, D13 and GND.
- 3. Connect the PN532 Screen to your Arduino using pins D2, D3, D4 and GND.
- 4. Load the example code provided in the PN532 library.
- 5. Check the datasheet for your PN532 Screen specifications.
- 6. Run the code and ensure the display works correctly.
- 7. Try sending test messages to the display.
- 8. Configure the display to show useful information for your project.
Example code
```
#include <PN532.h>
#include <PN532_I2C.h>

PN532_I2C pn532_i2c;
PN532 pn532(pn532_i2c);

void setup() {
  Serial.begin(9600);
  if (!pn532.begin()) {
    Serial.println("PN532 communication error");
    while (1);
  }
  Serial.println("PN532 initialized");
}

void loop() {
  Serial.println("Displaying 'Hello, World'");
  pn532.i2cWrite8(0x3E, 0x08); // Command to display 'Hello, World'
}
```
Mini project
Create a simple access control system using RFID/NFC and display the user name on the screen.
Common mistakes
- Error: The screen does not turn on. Check connections and voltage.
- Error: The code does not work. Check the Arduino IDE software version.
- Error: The display shows incorrect characters. Check the code configuration.
- Error: The screen is not responding. Check the connection to the PN532 board.
Recommended accessories
- PN532 Board
- RFID Antennas
- RFID Cards
- USB Cable
Frequently asked questions
How can I verify if my screen is working correctly?
Run the example code and check that the screen displays the correct message.
I lost the PN532 library. Where can I find it?
You can find the PN532 library on the Arduino website or on GitHub.
My screen is not displaying anything. What could have gone wrong?
Check the connections and code configuration. Make sure the voltage is correct.
Reviews
There are no reviews yet.