 EN
 IT Italiano
 ES Español
 FR Français
 DE Deutsch
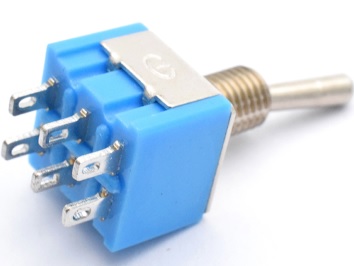
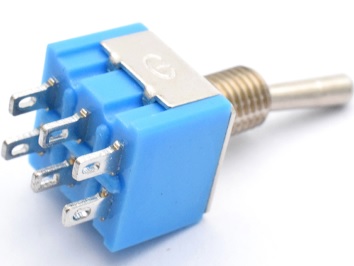
Description
What it is
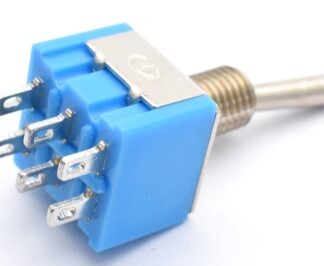
The MTS-203 Lever Switch 6 Pin 3 Positions is an electronic component that allows you to select among three different options. It consists of a lever that can take three distinct positions, each corresponding to a different circuit.
Features
- 6 pin
- 3 positions
- SKU: ARD0011419
- Price: 1.72 €
- Sold in packs of 2
What it is for
The MTS-203 lever switch is ideal for Arduino projects and other electronic devices that require selection among different options. You can use it to control LEDs, motors, sensors, or other components based on the lever’s position. Example: an LED display that changes configuration based on the switch position.
Tutorial: How to use MTS-203 Lever Switch 6 Pin 3 Positions
The MTS-203 toggle switch is a useful component for electronic projects that require selection between multiple options. Ideal for beginners and makers who want to add selection functionality to devices like Arduino boards.
What you need
- Connector Kit
- Arduino
- Power Supply
- LED
- Resistor
- Connection Wire
Steps
- Check the correct position of the switch according to the project requirements.
- Connect the connectors to the pins of the switch.
- Connect the switch to the Arduino using the connection wires.
- Verify the correct connection with a multimeter.
- Write an Arduino sketch to test the functionality of the switch.
- Connect an LED and a resistor to display the state of the switch.
- Test the configuration by changing the positions of the switch.
- End of tutorial.
Example code
void setup() {
  pinMode(2, INPUT);
  pinMode(3, INPUT);
  pinMode(4, INPUT);
}

void loop() {
  if(digitalRead(2) == HIGH) {
    Serial.println("Posizione 1");
  }
  if(digitalRead(3) == HIGH) {
    Serial.println("Posizione 2");
  }
  if(digitalRead(4) == HIGH) {
    Serial.println("Posizione 3");
  }
}
Mini project
Create an LED display that changes configuration based on the position of the switch. Try connecting an LED to each position of the switch.
Common mistakes
- Connect the switch to the circuit without testing it first.
- Use resistors that are too low or too high for the LEDs.
- Do not verify the correct connection between the switch and the Arduino.
- Do not update the Arduino sketch to adapt it to the project requirements.
Recommended accessories
- Connector kit
- Arduino Uno
- Set of various LEDs
- Set of various resistors
Frequently asked questions
Where can I find the datasheet?
Check the datasheet.
How many switches can I connect to Arduino?
Check the datasheet.
What are the dimensions of the switch?
Check the datasheet.
Reviews
There are no reviews yet.