 EN
 IT Italiano
 ES Español
 FR Français
 DE Deutsch

Description
What it is
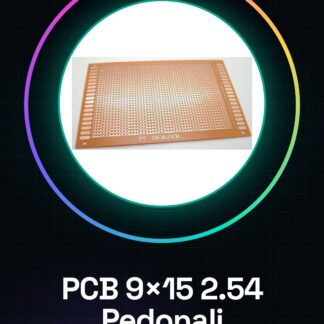
The single-sided through-hole perfboard is a fundamental component for prototyping printed circuit boards (PCB). With dimensions of 9×15 cm and a pitch of 2.00 mm, it is made of fiberglass, a durable material suitable for the creation of electronic circuits.
Features
- Dimensions: 9×15 cm
- Pitch: 2.00 mm
- Material: fiberglass
- Type: single-sided through-hole perfboard
What it is for
The perfboard is ideal for makers and students who want to create prototypes of electronic circuits on Arduino or other microcontrollers. You can use it to create simple lighting circuits with LEDs and resistors, or to test and develop more complex projects. As a prototyping base, it does not require expensive equipment to create functioning circuits.
Tutorial: How to Use Fiberglass Single-Sided Through-Hole Perfboard
The Multifaceted Glass Fiber Base Plate is a perfect base for PCB prototyping, ideal for makers working on electronics and prototype projects. This component is particularly useful for beginners who want to start working with PCBs without having to invest in expensive equipment.
What you need
- PCB
- electronic components
- solder
- utility knife
- electrical tape
Steps
- Prepare the PCB: Check the dimensions and compatibility with the base plate.
- Position the PCB on the base plate: Use electrical tape to secure it.
- Solder the components: Make sure to follow the specifications in the datasheet for each component.
- Check the connections: Ensure that all connectors are properly soldered.
- Test the circuit: Connect the circuit to your power supply and verify that it works correctly.
Mini project
Create a simple lighting circuit with an LED and resistors on this breadboard. Insert an LED and a resistor on the PCB, connect them correctly and test the circuit.
Common mistakes
- Do not use electrical tape to properly secure the PCB.
- Do not check the specifications of the components before soldering.
- Do not test the circuit after completing it.
- Do not clean the solder before soldering.
Recommended accessories
- PCB Cutting Kit
- Electronic Components Kit
- Soldering Kit
- USB Power Supply
Frequently asked questions
Is this breadboard suitable for larger PCBs?
Check the datasheet for the maximum supported dimensions.
Can I use any type of PCB on this breadboard?
Yes, but make sure the PCB is compatible with the breadboard.

Reviews
There are no reviews yet.