 EN
 IT Italiano
 ES Español
 FR Français
 DE Deutsch
Description
Technical Specifications
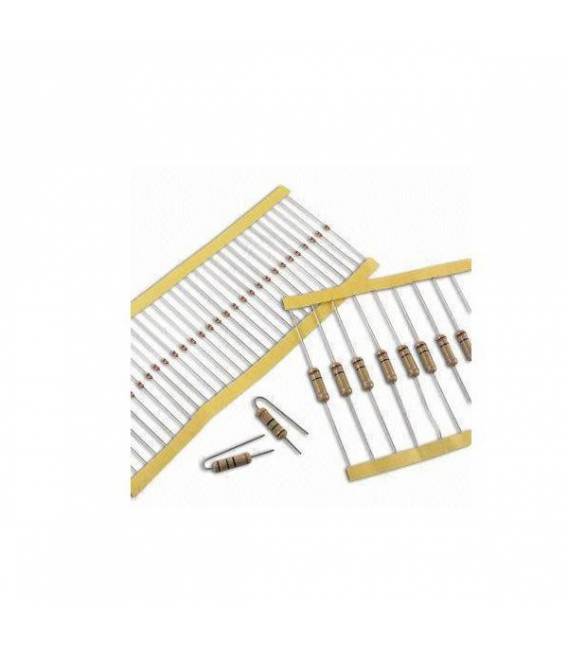
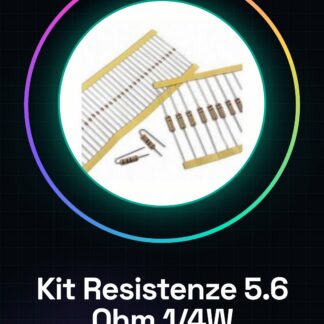
The 5.6 Ohm 1/4W 5% Resistor Kit contains 50 pieces of resistors with a value of 5.6 Ohm and a maximum power rating of 1/4 Watt. These resistors are used to limit or regulate current in electronic circuits, ensuring that the current flow does not exceed the safety limits of the resistor. They are suitable for Arduino projects and prototypes, where the precision of the value and power management are crucial.
Resistors are available in a kit of 50 pieces, making it easier to manage and use in projects that require multiple resistors of the same value. The resistance value tolerance is 5%, meaning the actual value can vary by up to 5% from the nominal value of 5.6 Ohm.
Key Specifications
| Parameter | Value |
| Model | 5.6 Ohm 1/4W 5% Resistor Kit |
| Quantity | 50 pieces |
| Resistance Value | 5.6 Ohm |
| Tolerance | 5% |
| Maximum Power | 1/4W |
| Container | N/A (see manufacturer’s datasheet) |
Installation and Usage
- Check the resistance value (5.6 Ohm) on the provided datasheet.
- Identify the maximum power rating of the resistance (1/4W) to avoid overloads.
- Connect the resistance to the circuit using the terminals.
- Check for short circuits or overloads.
- Verify the circuit operation with a multimeter.
Compatibility and Requirements
- The kit is compatible with electronic circuits requiring 5.6 Ohm resistors with a power rating of 1/4W.
- Suitable for Arduino projects and prototypes.
- To use it, an electronic circuit and a multimeter are required.
Limitations and Important Notes
- Not suitable for circuits requiring resistors with values other than 5.6 Ohm.
- The maximum power rating of 1/4W limits its use in circuits with high current flows.
- Be careful not to use the resistance beyond its 5% tolerance.
- Ensure not to exceed the maximum power during use.
Troubleshooting
The circuit does not work as expected.
Probable cause: Incorrect resistance value or overload.
Solution: Check the resistance value and maximum power.
The resistance overheats.
Probable cause: Overload of the resistance.
Solution: Check the maximum power of the resistance and resize the circuit if necessary.
The measured value of the resistance does not match the nominal value.
Probable cause: 5% tolerance.
Solution: Check the tolerance of the resistance value.
The circuit has short circuits.
Probable cause: Incorrect connection of the resistance.
Solution: Check connections and the position of the resistance in the circuit.
Use cases
LED Lighting Project
Objective: Regulate the current for an LED.
What is needed: 5.6 Ohm 1/4W 5% Resistance Kit
Steps: 1) Check the resistance value. 2) Connect the resistor between the Arduino control pin and the LED. 3) Verify the circuit operation with a multimeter.
Expected result: The resistor regulates the current for the LED.
Temperature Sensor Project
Objective: Limit the current for a temperature sensor.
Required: 5.6 Ohm 1/4W 5% Resistor Kit
Steps: 1) Check the resistance value. 2) Connect the resistor between the sensor and the read circuit. 3) Verify the circuit operation with a multimeter.
Expected result: The resistor limits the current for the sensor.
Motors Control Project
Objective: Regulate the current for a motor.
Required: 5.6 Ohm 1/4W 5% Resistor Kit
Steps: 1) Check the value of the resistance. 2) Connect the resistance between the motor and the control circuit. 3) Verify the circuit operation with a multimeter.
Expected result: The resistance regulates the current for the motor.
Internal Lighting Control Project
Objective: Regulate the current for an internal lighting circuit.
Required: 5.6 Ohm 1/4W 5% Resistance Kit
Steps: 1) Check the value of the resistance. 2) Connect the resistance between the control circuit and the internal lights. 3) Verify the circuit operation with a multimeter.
Expected result: The resistance regulates the current for the internal lights.
Fan Control Project
Objective: Regulate the current for a fan.
Required: 5.6 Ohm 1/4W 5% Resistance Kit
Steps: 1) Check the value of the resistance. 2) Connect the resistance between the fan and the control circuit. 3) Verify the circuit operation with a multimeter.
Expected result: The resistance regulates the current for the fan.
Relay Control Project
Objective: Limit the current for a relay.
Required: 5.6 Ohm 1/4W 5% Resistance Kit
Steps: 1) Check the value of the resistance. 2) Connect the resistance between the relay and the control circuit. 3) Verify the circuit operation with a multimeter.
Expected result: The resistance limits the current for the relay.
Motion Sensor Control Project
Objective: Limit the current for a motion sensor.
Required: 5.6 Ohm 1/4W 5% Resistance Kit
Steps: 1) Check the resistance value. 2) Connect the resistor between the motion detector and the control circuit. 3) Verify the circuit operation with a multimeter.
Expected result: The resistor limits the current for the motion detector.
Electric Lift Control Project
Objective: Regulate the current for an electric lift.
Kit Resistors 5.6 Ohm 1/4W 5%
Steps: 1) Check the resistance value. 2) Connect the resistor between the electric lift and the control circuit. 3) Verify the circuit operation with a multimeter.
Expected result: The resistor regulates the current for the electric lift.
In the package
- 50 pieces
Complete the project
- 50 Pieces Resistor, 10000 ohm, 10k, ohm 1/4w 1/4 w 5%, Arduino Compatible Resistors: For projects requiring 10000 Ohm resistors.
- 470 Ohm 1/4W 5% Resistor Kit – 50 Pieces: For projects requiring 470 Ohm resistors.
- 330 Ohm 1/4W 5% Resistor Kit – 50 Pieces: For projects requiring 330 Ohm resistors.
- 150 Ohm 1/4W 5% Resistor Kit – 50 Pieces: For projects requiring 150 Ohm resistors.
- 120 Ohm 1/4W 5% Resistor Kit – 50 Pieces: For projects requiring 120 Ohm resistors.
Technical FAQ
How powerful is this resistor?
The resistor has a maximum power rating of 1/4 Watt.
Why do I need resistors with a specific value like 5.6 Ohm?
Resistors with precise values are necessary to accurately calculate voltage and current in complex circuits.
How do I verify the value of the resistor?
Use a multimeter to measure the resistive value and compare it to the nominal value of 5.6 Ohm.
What are the usage limits of this resistor?
The resistance is not suitable for circuits requiring resistors with values other than 5.6 Ohm and the maximum power of 1/4W limits its use in circuits with high current flows.
Tutorial: How to Use 5.6 Ohm Resistor Kit
This resistor kit is ideal for electronic projects that require precise resistors in terms of value and power. It is particularly useful for beginners and makers working on simple circuits such as prototypes or small applications.
What you need
- Electric Circuits
- Arduino Prototypes
- School Projects
Steps
- Check the resistance value (5.6 Ohm) on the datasheet.
- Identify the maximum power of the resistor (1/4W).
- Connect the resistor to the circuit using the terminals.
- Check for short circuits or overloads.
- Verify the circuit operation with a multimeter.
- Test the effect of the resistor on the electric current.
Mini project
Create a simple LED lamp controlled by Arduino. Connect the resistor between the Arduino control pin and the LED to regulate the current.
Common mistakes
- Use a resistor with an incorrect value.
- Ignore the power rating of the resistor during connection.
- Do not verify the measured values before using the electronics.
Recommended accessories
- Arduino Starter Kit
- Digital Multimeter
- Set of connectors and cables
- Printed Circuit Board Printing
Frequently asked questions
How powerful is this resistor?
The resistor has a maximum power rating of 1/4 Watt.
Why do I need resistors with a specific value like 5.6 Ohm?
Resistors with precise values are necessary to correctly calculate voltage and current in complex circuits.
Reviews
There are no reviews yet.