 EN
 IT Italiano
 ES Español
 FR Français
 DE Deutsch
Description
Technical Specifications
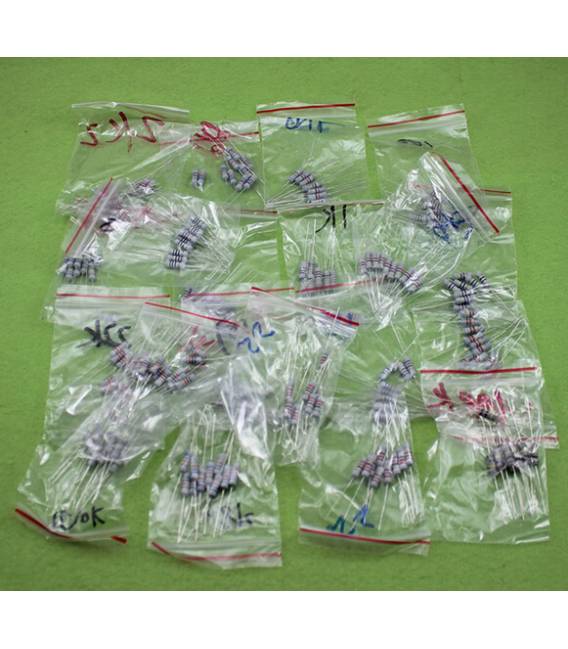
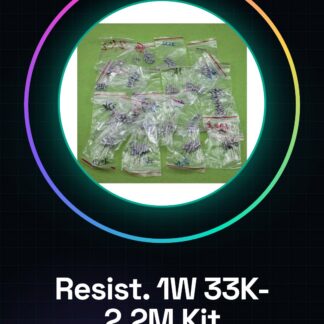
The 1 watt resistor kit includes a variety of values from 33K to 2.2M, in 23 different types. This kit is designed to provide high-value resistors for electronic projects that require precision and stability.
The resistors are made of carbon material and have a 5% tolerance. Each resistor is marked with a colored band to facilitate the identification of the value.
This kit is useful for projects that require high-value resistors, such as filtering circuits, voltage division, and overcurrent protection.
Key Specifications
| Parameter | Value |
| Model | 1 watt resistor kit |
| Values | 33K, 36K, 43K, 47K, 56K, 62K, 75K, 82K, 100K, 120K, 150K, 180K, 200K, 220K, 240K, 360K, 390K, 470K, 510K, 560K, 750K, 820K, 2.2M |
| Quantity | 10 pieces |
| Power | 1 watt |
| Tolerance | 5% |
| Material | Carbon |
| Dimensions | N/A (see manufacturer’s datasheet) |
| Container | N/A (see manufacturer’s datasheet) |
Installation and Usage
- Check the specifications of the resistors on the datasheet.
- Connect the resistor to the circuit according to the project.
- Test the resistor with a multimeter to verify the value.
- Repeat steps 2 and 3 for all resistors in the kit.
- Verify the correct installation of the circuit.
Compatibility and Requirements
- This kit is compatible with Arduino Uno and compatible systems.
- Needed for test connections and multimeter to test the resistors.
- Suitable for electronic projects that require high-value resistors.
Limitations and Important Notes
- It is not possible to use resistors with values lower than those specified in the kit.
- Be careful not to connect the resistor incorrectly in the circuit.
- Always check the value of the resistor before use.
- Ensure that the circuit can handle the power rating of the resistor.
Troubleshooting
The circuit does not work as expected.
Probable cause: Incorrect value of the resistor.
Solution: Verify the value of the resistor with a multimeter.
The resistor overheats.
Probable cause: Circuit power exceeds the resistor’s power rating.
Solution: Choose a resistor with a higher power rating.
The value of the resistor does not match the expected value.
Probable cause: Error in reading the color-coded ring.
Solution: Verify the value of the resistor with a multimeter.
The circuit does not respond.
Probable cause: Incorrect connection of the resistor.
Solution: Verify the connection of the resistor in the circuit.
Use cases
Temperature sensor for the lab
Objective: Measure ambient temperature.
What is needed: High-value resistor kit.
Steps: 1) Calculate the value of the resistance needed for the voltage divider. 2) Connect the resistance to the circuit. 3) Test the resistance with a multimeter. 4) Verify the correct temperature measurement.
Expected result: The circuit correctly measures the temperature.
Low-pass filter for the garage
Objective: Filter out electronic interference.
What is needed: High-value resistor kit.
Steps: 1) Calculate the value of the resistance needed for the filter. 2) Connect the resistance to the circuit. 3) Test the resistance with a multimeter. 4) Verify the correct function of the filter.
Expected result: The filter correctly blocks the interference.
Voltage divider for the school project
Objective: Divide the supply voltage.
What is needed: High-value resistor kit.
Steps: 1) Calculate the value of the resistance needed for voltage division. 2) Connect the resistance to the circuit. 3) Test the resistance with a multimeter. 4) Verify the correct voltage division.
Expected result: The circuit correctly divides the voltage.
Overload protection for the computer
Objective: Protect the circuit from overloads.
Required: High value resistor kit.
Steps: 1) Calculate the value of the resistance needed for protection. 2) Connect the resistance to the circuit. 3) Test the resistance with a multimeter. 4) Verify the correct protection of the circuit.
Expected result: The circuit is correctly protected from overloads.
Current control circuit for the laboratory
Objective: Regulate the current of the circuit.
Required: High value resistor kit.
Steps: 1) Calculate the value of the resistance needed for current regulation. 2) Connect the resistance to the circuit. 3) Test the resistance with a multimeter. 4) Verify the correct current regulation.
Expected result: The circuit correctly regulates the current.
High-pass audio filter
Objective: Filter out low frequencies.
What’s needed: High-value resistor kit.
Steps: 1) Calculate the value of the resistance needed for the filter. 2) Connect the resistance to the circuit. 3) Test the resistance with a multimeter. 4) Verify the correct function of the filter.
Expected result: The filter correctly blocks low frequencies.
Voltage divider circuit for lighting
Objective: Divide the supply voltage.
What’s needed: High-value resistor kit.
Steps: 1) Calculate the value of the resistance needed for voltage division. 2) Connect the resistance to the circuit. 3) Test the resistance with a multimeter. 4) Verify the correct voltage division.
Expected result: The circuit correctly divides the voltage.
Overload protection circuit for the security system
Objective: Protect the circuit from overloads.
What you need: High value resistor kit.
Steps: 1) Calculate the value of the resistance needed for protection. 2) Connect the resistance to the circuit. 3) Test the resistance with a multimeter. 4) Verify the correct protection of the circuit.
Expected result: The circuit is correctly protected from overloads.
In the package
- 10 pieces
Complete the project
- Metal film resistors kit 1%, 82K-1M, 10 pieces from 24 types: 75K, 82K, 91K, 100K, 120K, 150K, 180K, 200K, 220K, 240K, 270K: To test and verify the values of resistors.
- Colored band 1/4 w Kit resistors 75k-2.2M 10 pieces from 21 types: 75K 91K 100K 120K 150K 180K 200K 220K 240K 270K 300K 330K 390: For projects that require high value resistors.
- Colored band 1/4 w Kit resistors 0R-100R 10 pieces from 17 types: 0,5 1 2,2 4,7 5,1 10 15 20 30 33 36 47 56 68 75 82 100 100/4 w
- 50 Pieces Resistance, 10000 ohm, 10k, ohm 1/4w 1/4 w 5%, Compatible with Arduino
- 2 Pieces 3296W-104 (100K) Precision can increase the potential 3296 potentiometer Adjustable Resistance
Technical FAQs
What is the maximum power of the resistors?
Check the product datasheet.
How do you choose the right resistor for a project?
Calculate the necessary value based on the circuit’s current and voltage requirements.
What is the tolerance of the resistors?
The tolerance of the resistors is 5%.
What is the size of the resistors?
N/D (see the manufacturer’s datasheet).
Tutorial: How to use 1W Resistor Kit (33K-2.2M)
This kit contains 1 watt resistors in a varied range for electronic projects.
What you need
- Kit ARD00591
- Arduino Uno or compatible
- Test connections
Steps
- Check the specifications of the resistors on the datasheet.
- Connect the resistor to the circuit according to the project.
- Test the resistor with a multimeter to verify the value.
- Repeat steps 2 and 3 for all resistors in the kit.
Mini project
Create a simple LED dimmer using a variable resistor.
Common mistakes
- Using a resistor with an incorrect value.
- Not verifying the value of the resistor before use.
- Connecting the resistor incorrectly in the circuit.
Recommended accessories
- Arduino Uno
- Test connections
- Multimeter
Frequently asked questions
What is the maximum power rating of the resistors?
Check the product datasheet.
How do you choose the right resistor for a project?
Calculate the required value based on the circuit’s current and voltage requirements.
Reviews
There are no reviews yet.