 EN
 IT Italiano
 ES Español
 FR Français
 DE Deutsch
Description
Technical Specifications
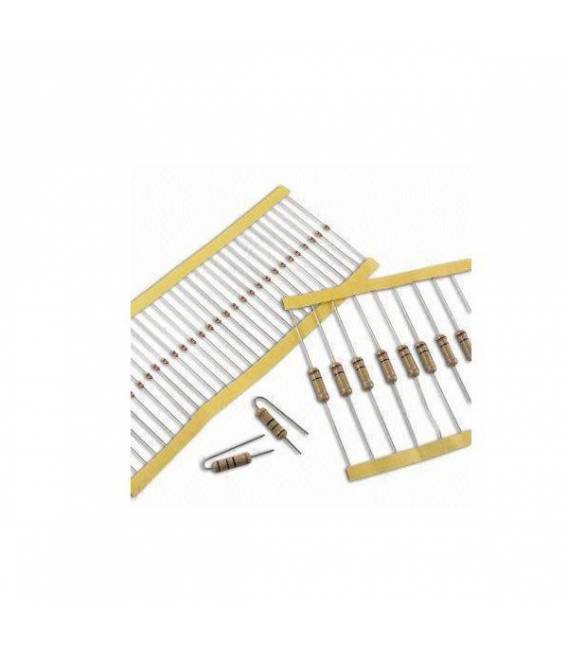
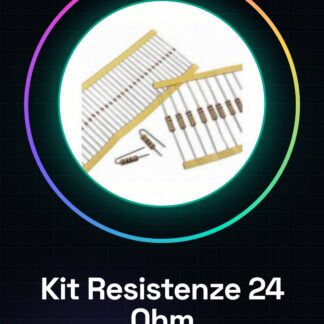
The 24 Ohm 1/4W 5% Resistor Kit is an essential component for the realization of electronic projects, used to limit the flow of current in various circuits. The resistors are available in a kit of 50 pieces, with a tolerance of 5% and a maximum power of 1/4W. This kit is particularly useful for projects that require low-value resistors, such as voltage stabilizers or protection circuits.
Each resistor in the kit is marked with a colored code that indicates the resistive value. Their small size and low power make these resistors suitable for use in prototyped circuits and small-sized projects. It is important to check the component specifications before using them in high-voltage circuits or with higher power.
To ensure the proper functioning of the circuit, it is necessary to correctly connect the ends of the resistor to the appropriate points in the circuit and verify with a multimeter that the resistive value is in accordance with the expected value.
Key Specifications
| Parameter | Value |
| Model | 24 Ohm 1/4W 5% Resistor Kit |
| Quantity | 50 pieces |
| Resistive Value | 24 Ohm |
| Tolerance | 5% |
| Maximum Power | 1/4W |
| Dimensions | N/D (see manufacturer’s datasheet) |
| Container | Plastic container with lid |
| Interface | N/D (see manufacturer’s datasheet) |
Installation and Usage
- Check the datasheet for the maximum power rating (1/4W) and the resistance value (24 Ohm).
- Identify the distinctive markings of the component: usually a colored circle with color code.
- Connect one end of the resistor to a digital pin on the Arduino, the other end to GND or a power supply.
- Use the resistor to limit the current flow in prototype circuits.
- Verify with a multimeter that the resistor is correctly connected and functioning as expected.
Compatibility and Requirements
- This resistor kit is compatible with Arduino Uno R3 and other electronic prototyping systems.
- A USB Type B cable is required to connect the Arduino to the computer during programming.
- For more complex projects, a capacitor kit or variable resistors kit may be necessary.
Limitations and Important Notes
- This kit is not designed for circuits requiring resistors with power ratings higher than 1/4W.
- Be careful not to connect the resistor to the circuit incorrectly, it could damage the component.
- Always check the component specifications before using it in high voltage circuits.
- Use a multimeter to correctly verify the resistive value of the resistor.
Troubleshooting
The resistor does not work as expected.
Probable cause: Incorrect connection or resistive value not conforming to specifications.
Solution: Check the connection and resistive value with a multimeter.
The circuit does not respond correctly.
Probable cause: Using an inadequate resistor for the required power.
Solution: Check the component specifications and use an adequate resistor.
The resistor overheats.
Probable cause: Usage in a circuit with power exceeding the component’s tolerance.
Solution: Replace the resistor with one of higher power rating.
The resistive value does not conform to specifications.
Probable cause: Mechanical damage or use in extreme conditions.
Solution: Replace the resistor with a new one.
Use cases
Parking sensor for the garage
Objective: Create an alarm system for the parking area.
What’s needed: 24 Ohm 1/4W 5% Resistor Kit.
Steps: 1) Connect a resistor to the alarm sensor circuit. 2) Configure the Arduino to detect the presence of vehicles. 3) Test the system to ensure it works correctly.
Expected result: A functioning alarm system for the parking area.
Voltage regulator for power supply
Objective: Create a voltage regulator to power a circuit.
What’s needed: 24 Ohm 1/4W 5% Resistor Kit.
Steps: 1) Connect a resistor between the power supply and the circuit. 2) Adjust the resistor to stabilize the voltage. 3) Test the circuit to ensure the voltage is stable.
Expected result: A functioning voltage regulator to power the circuit.
Domestic Lighting Project
Objective: Create a lighting system controlled by Arduino.
What you need: 24 Ohm 1/4W 5% Resistor Kit.
Steps: 1) Connect a resistor between the LED and the Arduino. 2) Configure the Arduino to turn on the LED. 3) Test the system to ensure the LED turns on correctly.
Expected result: A lighting system controlled by Arduino.
Domestic Automation Project
Objective: Create a door and window control system.
What you need: 24 Ohm 1/4W 5% Resistor Kit.
Steps: 1) Connect a resistor to the door control circuit. 2) Configure the Arduino to open and close the doors. 3) Test the system to ensure it works correctly.
Expected result: A functioning door and window control system.
Electronic Prototyping Project
Objective: To create an electronic circuit prototype.
What’s needed: 24 Ohm 1/4W 5% Resistor Kit.
Steps: 1) Connect a resistor to the prototyped circuit. 2) Configure the Arduino to test the circuit. 3) Test the circuit to ensure it works correctly.
Expected result: A functioning electronic circuit prototype.
Electronic Testing Project
Objective: To create a testing system for electronic components.
What’s needed: 24 Ohm 1/4W 5% Resistor Kit.
Steps: 1) Connect a resistor to the test circuit. 2) Configure the Arduino to test components. 3) Test the system to ensure it works correctly.
Expected result: A functioning electronic component testing system.
Electronic Maintenance Project
Objective: Create a maintenance system for electronic components.
What’s needed: 24 Ohm 1/4W 5% Resistor Kit.
Steps: 1) Connect a resistor to the maintenance circuit. 2) Configure the Arduino to monitor components. 3) Test the system to ensure it works correctly.
Expected result: A functioning electronic component maintenance system.
Electronic Repair Project
Objective: Create a repair system for electronic components.
What’s needed: 24 Ohm 1/4W 5% Resistor Kit.
Steps: 1) Connect a resistor to the repair circuit. 2) Configure the Arduino to repair components. 3) Test the system to ensure it works correctly.
Expected result: A functioning electronic component repair system.
In the package
- 50 pieces
Complete the project
- 50 Pieces Resistor, 10000 ohm, 10k, ohm 1/4w 1/4 w 5%, Arduino compatible resistors: Needed to complete the kit of components necessary for Arduino projects.
- : 470 Ohm 1/4W 5% Resistor Kit – 50 Pieces: Needed to stabilize voltage in prototyped circuits.
- : 330 Ohm 1/4W 5% Resistor Kit – 50 Pieces: Needed to complete the capacitor kit necessary for electronic prototyping projects.
Technical FAQs
What is the maximum power this resistor can handle?
Check the datasheet, but usually 1/4W.
Can I use these resistors in circuits with higher voltage?
Avoid doing so without first checking the component specifications.
How do I verify the resistive value of the resistor?
Use a multimeter to measure the resistive value.
What are the usage limits for these resistors?
This kit is not designed for circuits requiring resistors with power ratings higher than 1/4W.
Tutorial: How to Use 24 Ohm Resistor Kit
The 24 ohm resistor kit is a fundamental component for electronic projects, ideal for both beginners and more experienced makers. This kit allows you to add current limiting in various circuits.
What you need
- Arduino projects
- prototyped circuits
- voltage regulators
Steps
- Check the datasheet for the maximum allowed power (1/4W) and the resistance value (24 ohm).
- Identify the distinctive markings of the component: usually a colored circle with color code.
- Connect one end of the resistor to the digital pin of the Arduino, the other end to GND or power supply.
- Use the resistor to limit the current flow in prototyped circuits.
- Check with a multimeter if the resistor is correctly connected and functioning as expected.
- Insert the resistors into your project using the appropriate pins of the Arduino.
Mini project
Create a simple lighting circuit with an LED that turns on when the digital pin value exceeds a certain level, regulated by the resistor.
Common mistakes
- Incorrect connection of the resistor
- Use of an inadequate resistor for the required power
- Selection of non-optimal values that compromise the circuit’s functionality
Recommended accessories
- Kit Capacitors 10µF
- Kit Variable Resistors
- Arduino Uno R3
- USB Type B Cable for Arduino
Frequently asked questions
What is the maximum power this resistor can handle?
Check the datasheet, but typically 1/4W.
Can I use these resistors in circuits with higher voltage?
Avoid doing so without first checking the component specifications.
Reviews
There are no reviews yet.