 EN
 IT Italiano
 ES Español
 FR Français
 DE Deutsch


Description
What it is
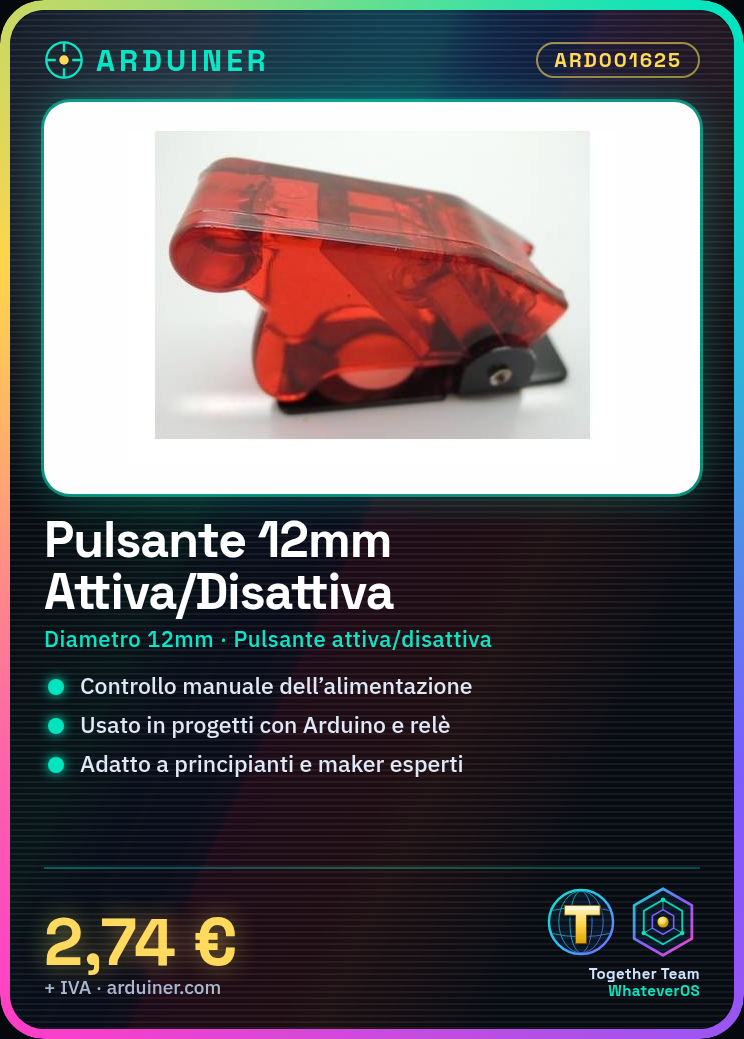
The 12mm ARD001625 button is an electronic component used to activate or deactivate the flow of power in various devices. This type of button is particularly useful when manual control of a device’s power supply is desired.
Features
- Diameter: 12mm
- Type: Active/Deactivate Button with Cover
- Product ID: ARD001625
What it is for
This button is ideal for projects that require manual power control, such as devices that turn on and off automatically based on the state of the button. It is compatible with various circuits and can be used by both beginners and experts.
Tutorial: How to Use Active/Deactivate Button
The on/off switch is an essential component for anyone working on projects that require interrupting or starting the flow of electricity. Ideal for both beginners and more experienced makers, this switch offers an easy solution for controlling power.
What you need
- Arduino Uno
- USB cable
- Power connection
Steps
- Connect the switch to a digital pin on the Arduino using a jumper wire. Check the datasheet for the required pull-up or pull-down resistor.
- Connect the other end of the switch to the power supply (5V) and ground (GND).
- Write an Arduino sketch to read the state of the switch. Use the ‘digitalRead()’ command to determine whether the switch is pressed or not.
- If necessary, add software debounce to avoid false positives caused by the mechanical bounce of the switch.
- Test the sketch by loading the Arduino and pressing the button. Verify that the state variable changes correctly.
- If you are using this button to activate/deactivate a circuit, make sure to connect it to an output pin of the Arduino with a relay or a MOSFET as a switch.
Example code
const int buttonPin = 2; // pin del pulsante
int buttonState = 0;
void setup() {
pinMode(buttonPin, INPUT);
}
void loop() {
buttonState = digitalRead(buttonPin);
if (buttonState == HIGH) {
Serial.println("Pulsante premuto");
} else {
Serial.println("Pulsante rilasciato");
}
}
Mini project
Create a device that turns on and off automatically based on the state of the activate/deactivate button. You can use this project to control the power supply of an external circuit or to manage the operation of a lamp.
Common mistakes
- Connect the button directly to 5V without pull-up/down resistance
- Do not add software debounce
- Ignore the button state verification during testing
Recommended accessories
- Relay for Arduino
- MOSFET
- Arduino Uno R3
- Power connection
Frequently asked questions
How do I connect the button to a relay?
Connect the output of the button to the input of the relay and ensure that the relay’s output voltage is adequately isolated from the Arduino’s power supply.
Can I use this button to control a low voltage circuit?
Yes, but make sure you have the correct MOSFET or relay capable of handling the voltage and current of the external circuit.


Reviews
There are no reviews yet.