 EN
 IT Italiano
 ES Español
 FR Français
 DE Deutsch
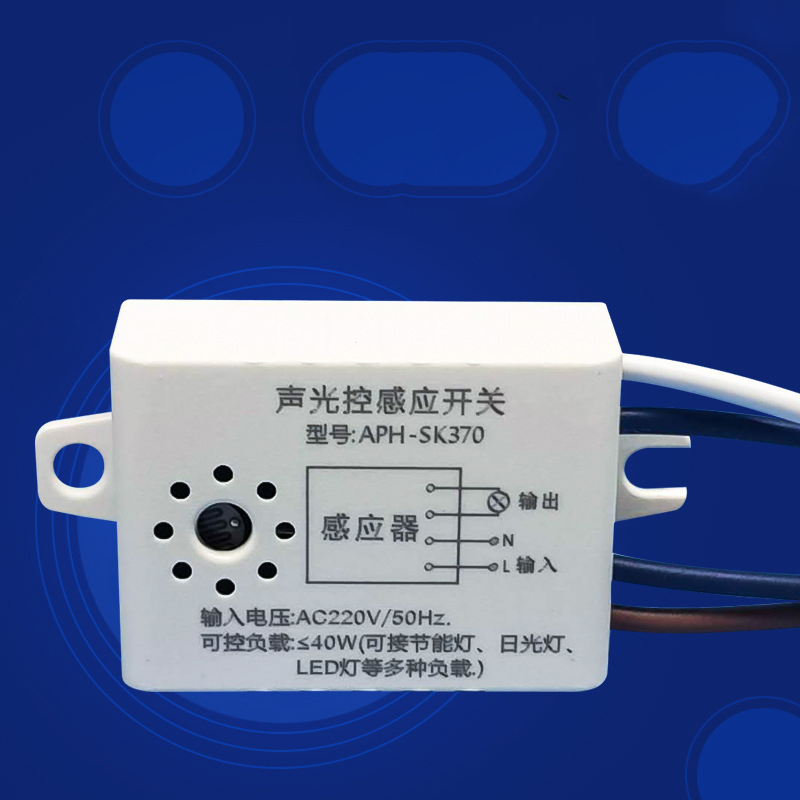
Description
What it is
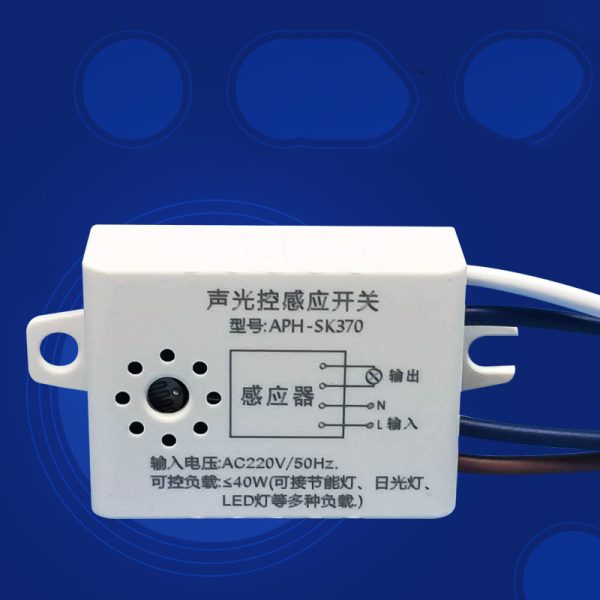
The 3700 sound and light control switch for LED lamps is a device that automatically regulates ambient light and sound. It is ideal for creating automatic lighting systems that only activate when it is dark and there is noise.
Features
- Automatic regulation of ambient light and sound
- Ideally suited for LED lighting projects
- Compatible with automatic light and sound control systems
What it is for
This sensor is perfect for DIY projects, hobbies, and small applications. It can be used to create an automatic lighting system for a room that only activates when there is noise and the light is low. It is compatible with Arduino and ESP for custom programming and configuration.
Tutorial: How to use Sound and Light Control Sensor 3700
This sound and light control sensor 3700 is ideal for creating automatic lighting systems that only activate when it’s dark and there is noise. It’s perfect for DIY projects, hobbies, and small applications.
What you need
- Arduino Uno
- LED
- Resistor
- Jumper cable
- Battery or power supply
Steps
- Connect the sound and light control sensor 3700 to the Arduino Uno using jumper cables
- Connect the LED and resistor between the Arduino and the sensor
- Write an Arduino sketch to manage the lighting based on the sensor data
- Check the datasheet to determine the control pins of the sensor
- Test the system under varying light and noise conditions
- Optimize the sensitivity of the sensor for specific usage conditions
- Install a timer to automatically turn off the light after a certain period of time
- Connect to a cloud service to remotely monitor the sensor data
Example code
void setup() {
  pinMode(LED_BUILTIN, OUTPUT);
  pinMode(A0, INPUT);
}

void loop() {
  int soundLevel = analogRead(A0);
  if (soundLevel > 500) {
    digitalWrite(LED_BUILTIN, HIGH);
  } else {
    digitalWrite(LED_BUILTIN, LOW);
  }
}
Mini project
Create an automatic lighting system for a room that only activates when there is noise and the light level is low. Test the system with different levels of noise and light to optimize it.
Common mistakes
- Do not check the sensitivity of the sensor before installation
- Do not connect the LED and resistor correctly
- Do not test the system in real usage conditions
- Do not add a timer to automatically turn off the light
Recommended accessories
- Arduino Uno
- RGB LED
- 220 ohm resistor
- 9V battery
Frequently asked questions
Does the sensor work in bright light conditions?
Check the datasheet to determine the sensitivity of the sensor at different light levels.
Can I connect multiple LEDs to the sensor?
Yes, but make sure to use an appropriate resistor for each LED.
Is it possible to connect the sensor to a Raspberry Pi?
Yes, but it will be necessary to write a specific sketch for the Raspberry Pi.
Reviews
There are no reviews yet.