 EN
 IT Italiano
 ES Español
 FR Français
 DE Deutsch
Description
Technical Specifications
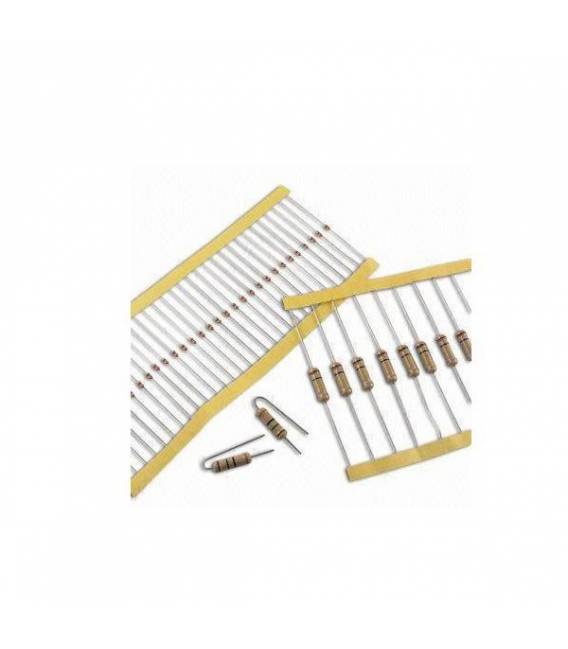
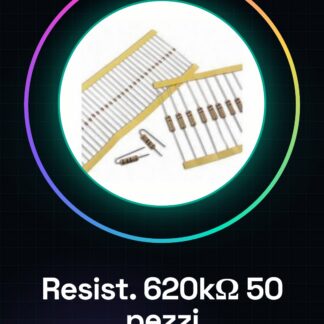
The 620K ohm resistor is an electronic component used to limit current and regulate voltage in a circuit. This type of resistor is essential for projects that require the management of specific voltages and currents. The 620K ohm resistor is available in a pack of 50 pieces, with a 5% tolerance value and a maximum power rating of 1/4 watt.
The component is designed to be used in various types of electronic circuits, such as prototypes and home automation projects. The resistor can be easily connected to a circuit through its metal terminals, ensuring good electrical contact.
For safe and correct use, it is important to verify the resistance value with a multimeter before connecting it to the circuit. Additionally, it is essential to consider the power specifications of the resistance to avoid damage due to overvoltage or overcurrent.
Key Specifications
| Parameter | Value |
| Model | 620K ohm Resistor |
| Value | 620000 ohm |
| Tolerance | 5% |
| Maximum Power | 1/4 watt |
| Quantity | 50 pieces |
| Packaging | Pack of 50 pieces |
Installation and Usage
- Verify the resistance value with a multimeter.
- Connect the resistor to the circuit using the metal ends.
- Ensure that the resistance value is in accordance with the project specifications.
- Check that the maximum power rating of the resistor is sufficient for the circuit.
- Perform an initial circuit test to verify functionality.
Compatibility and Requirements
- The 620K ohm resistor is compatible with Arduino Uno and other electronic systems.
- A multimeter is required to verify the resistance value before installation.
- An electronic circuit is necessary to connect the resistor.
Limitations and Important Notes
- The 620K ohm resistor cannot handle voltages and currents above its maximum power rating of 1/4 watt.
- It is important to verify the resistance value with a multimeter before using it.
- The resistor is not designed for high-power applications.
- The resistor is not suitable for circuits requiring precision better than 5%.
Troubleshooting
The resistor is not working as expected.
Probable cause: The value of the resistor does not conform to the project specifications.
Solution: Check the value of the resistor with a multimeter and replace it if necessary.
The circuit does not respond correctly.
Probable cause: The power rating of the resistor is not sufficient for the circuit.
Solution: Replace the resistor with one of higher power rating.
The resistor overheats.
Probable cause: The resistor is subjected to voltages or currents above its maximum power rating.
Solution: Redesign the circuit to reduce the power applied to the resistor.
The value of the resistor is incorrect.
Probable cause: The value of the resistor was not verified before installation.
Solution: Check the value of the resistor with a multimeter and replace it if necessary.
Use cases
Distance sensor
Objective: Regulate the power supply voltage for the sensor.
What is needed: 620K ohm resistor for voltage division.
Steps: 1) Check the value of the resistor. 2) Connect the resistor to the circuit. 3) Measure the output voltage.
Expected result: The output voltage is correctly regulated.
Protection Circuit
Objective: Limit the current to protect sensitive components.
What is needed: 620K ohm resistor to limit the current.
Steps: 1) Check the value of the resistor. 2) Connect the resistor to the circuit. 3) Check the current flow.
Expected result: The current is correctly limited.
Voltage Divider Circuit
Objective: Regulate the output voltage of the circuit.
What is needed: 620K ohm resistor for voltage division.
Steps: 1) Check the value of the resistor. 2) Connect the resistor to the circuit. 3) Measure the output voltage.
Expected Outcome: The output voltage is correctly regulated.
LED Protection Circuit
Objective: Limit the current to protect the LED.
What’s needed: A 620K ohm resistor to limit the current.
Steps: 1) Check the value of the resistor. 2) Connect the resistor to the circuit. 3) Check the current flow.
Expected Outcome: The current is correctly limited.
Sensor Protection Circuit
Objective: Limit the current to protect the sensors.
What’s needed: A 620K ohm resistor to limit the current.
Steps: 1) Check the value of the resistor. 2) Connect the resistor to the circuit. 3) Check the current flow.
Expected Outcome: The current is correctly limited.
Relay Protection Circuit
What’s needed: A 620K ohm resistor to limit the current.
Steps: 1) Check the value of the resistor. 2) Connect the resistor to the circuit. 3) Check the current flow.
Expected result: The current is correctly limited.
Motors protection circuit
What is needed: 620K ohm resistor to limit the current.
Steps: 1) Check the value of the resistor. 2) Connect the resistor to the circuit. 3) Check the current flow.
Expected result: The current is correctly limited.
Power supply protection circuit
What is needed: 620K ohm resistor to limit the current.
Steps: 1) Check the value of the resistor. 2) Connect the resistor to the circuit. 3) Check the current flow.
Expected result: The current is correctly limited.
In the package
- 50 pieces
Complete the project
- 50 Pieces Resistor 1000 ohm 1k ohm 1/4w 1/4 w 5%: To check the value of the resistor.
- 50 Pieces Resistance, 10000 ohm, 10k, ohm 1/4w 1/4 w 5%, Compatible with Arduino: To create voltage divider circuits.
- 50 Pieces Resistance 100 ohm 1/4w 5%: To create protection circuits for sensitive components.
Technical FAQs
How to verify the value of the resistance?
The value of the resistance can be verified using a multimeter. Select the correct measurement scale and connect the multimeter probes to the ends of the resistance.
What is the maximum power of the resistance?
The maximum power of the resistance is 1/4 watt.
What is the tolerance of the resistance value?
The tolerance of the resistance value is 5%.
What is the quantity of resistors contained in the package?
The package contains 50 pieces of 620K ohm resistors.
Tutorial: How to use 620K ohm Resistance
The 620K ohm resistor is a fundamental component for electronic projects that require current limiting or voltage division. Ideal for beginners and intermediate makers.
What you need
- Arduino Uno
- test instrument (multimeter)
- supplied: 620K ohm resistor
Steps
- Check the resistor with the multimeter.
- Connect the red lead of the multimeter to the red band of the resistor and the black lead to the white or brown band.
- Select the correct measurement range on the multimeter to ensure an accurate reading. Check the datasheet if necessary.
- Once the value is verified, connect the resistor to the circuit according to the project requirements.
Mini project
Create a simple voltage divider circuit using the 620K ohm resistor and a second resistor. Measure the output voltage to understand how the principle works.
Common mistakes
- Do not check the value of the resistor before use.
- Connect the resistor to the circuit without considering its power rating (1/4w).
- Use an inappropriate scale on the multimeter during measurement.
Recommended accessories
- Arduino Uno
- Variable resistor kit
- 3D printing for prototype projects
Frequently asked questions
How is the value of a resistor calculated?
The value is indicated on the body of the resistor in color code. Check the color chart or consult the datasheet if available.
What is the purpose of a 620K ohm resistor?
It is used to limit the electric current in a circuit, protect sensitive components, and regulate voltages.
Reviews
There are no reviews yet.