 EN
 IT Italiano
 ES Español
 FR Français
 DE Deutsch
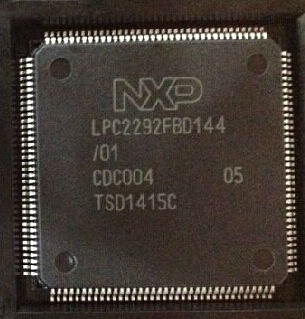
Description
Tutorial: How to Use LPC2292FBD144/01 IC Integrated Circuits
The LPC2292FBD144/01 IC is a powerful ARM7TDMI-S microcontroller used in advanced electronics projects. This tutorial will guide you through the initial steps to use it in a project.
What you need
- Arduino Uno or compatible
- USB cable
- breadboard
- jumper wires
- power supply
Steps
- Refer to the official documentation to understand the features of the LPC2292FBD144/01 IC.
- Connect the IC to the breadboard following the datasheet.
- Connect the Arduino to the breadboard to provide power and communication.
- Check the connection between the IC and the Arduino using the built-in LED on the Arduino.
- Install the necessary driver to communicate with the LPC2292FBD144/01 IC.
- Write a simple sketch that interacts with the IC.
- Upload the sketch to the Arduino.
- Test the functionality of the LPC2292FBD144/01 IC with the example project.
Mini project
Create a device that changes the LED brightness based on commands received from a software interface.
Common mistakes
- Do not properly verify the IC documentation.
- Use inadequate power supply.
- Do not properly configure communication between Arduino and IC.
- Ignore connection verification before uploading code.
Recommended accessories
- Arduino Uno
- Breadboard
- LED
- Resistor
Frequently asked questions
Where can I find the datasheet?
The datasheet is available on the chip manufacturer’s website for LPC2292FBD144/01.
Which programming languages can I use?
You can use C, C++ and other languages supported by the microcontroller.
Reviews
There are no reviews yet.