 EN
 IT Italiano
 ES Español
 FR Français
 DE Deutsch
Description
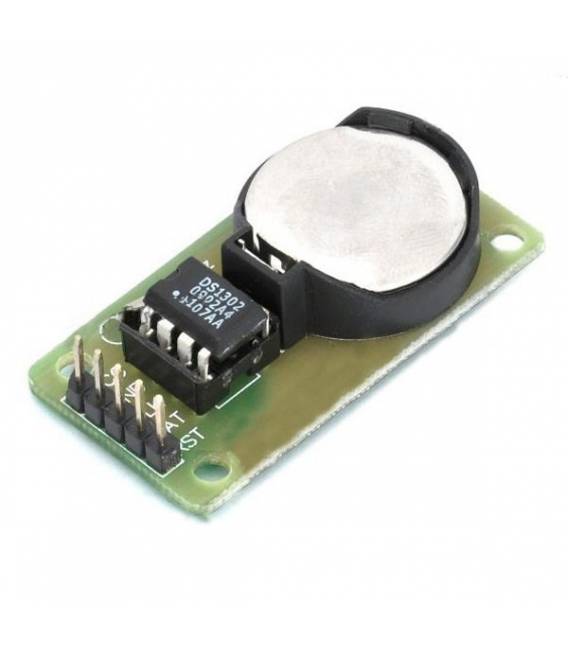
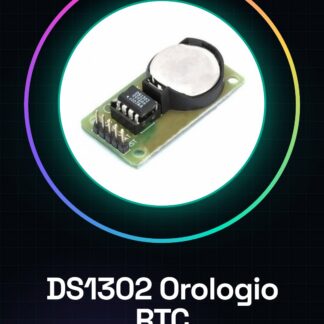
DS1302 RTC (Real Time Clock) Module with Memory, Battery and Calendar – Complete Description and Guide for Use with Arduino
🕒 DS1302 RTC Module Description
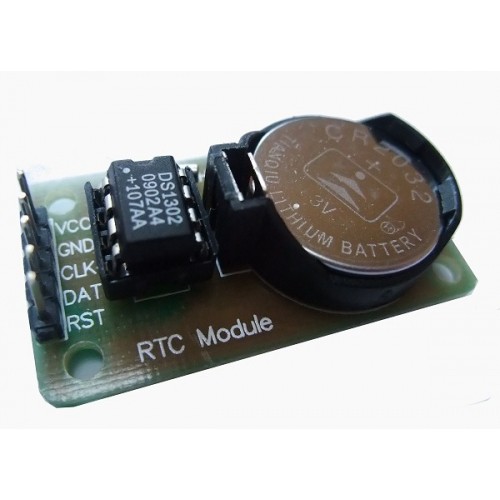
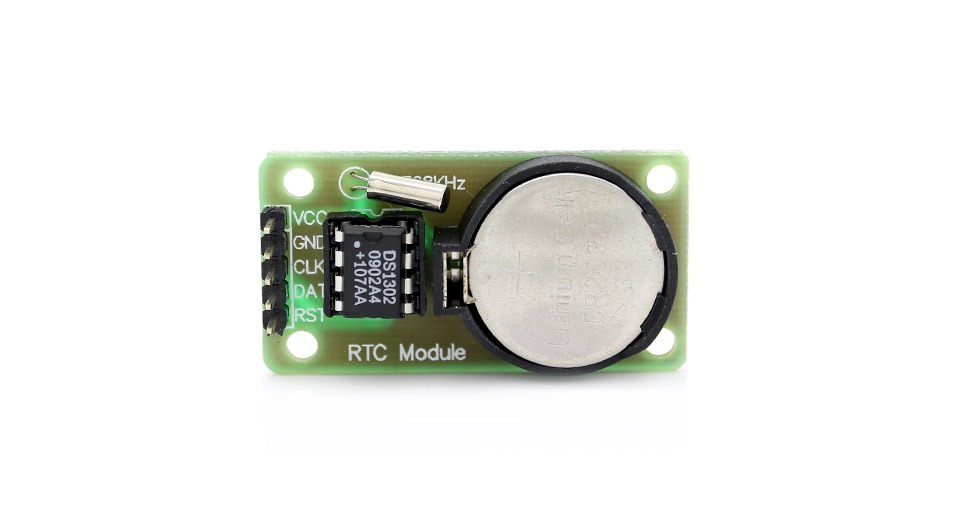
The DS1302 is a real-time clock (RTC) module that allows precise tracking of time and calendar even in the absence of power supply, thanks to a also without power, thanks to a (usually CR2032 type). It is widely used in projects with Arduino, ESP8266, ESP32, Raspberry Pi and other microcontrollers. Technical Specifications
Specification
| Detail | RTC Chip |
|---|---|
| DS1302 | DS1302 |
| Power Supply | 3.3V – 5.5V (compatible with Arduino) |
| Communication | 3-wire serial (SCLK, I/O, CE) |
| Backup Battery | CR2032 support (not always included) |
| RAM Memory | 31 bytes of static RAM for general use |
| Accuracy | ±1 minute/month typical (un-calibrated) |
| Date Range | 01/01/1900 – 31/12/2099 |
| Features | Clock, calendar, RAM, battery backup |
🔌 DS1302 Connection with Arduino
| DS1302 Pins | Connection to Arduino |
|---|---|
| VCC | 5V (or 3.3V) |
| GND | GND |
| CLK (SCLK) | D6 |
| I/O | D7 |
| CE (RST) | D8 |
📦 Recommended library for Arduino
To use the DS1302 module with Arduino, you can install the library “DS1302RTC” by Paul Stoffregen, which simplifies reading/writing to the clock.
🔧 Library Installation
- Open the Arduino IDE
- Go to Sketch > Include Library > Manage Libraries
- Search for DS1302RTC and install the library by Paul Stoffregen
🧪 Example Code to Set and Read Date/Time
#include <DS1302RTC.h>
#include <TimeLib.h>
#include <Wire.h>
#include <Streaming.h>

// Pin collegati al modulo DS1302: CE, I/O, CLK
DS1302RTC rtc(8, 7, 6);

void setup() {
  Serial.begin(9600);

  // Imposta l’orario solo la prima volta
  // Imposta: Anno, Mese, Giorno, Ora, Minuti, Secondi
  tmElements_t tm;
  tm.Year = CalendarYrToTm(2025); // Anno - 1970
  tm.Month = 7;
  tm.Day = 28;
  tm.Hour = 15;
  tm.Minute = 45;
  tm.Second = 0;
  rtc.write(tm);

  Serial.println("Ora impostata!");
}

void loop() {
  tmElements_t tm;
  if (rtc.read(tm)) {
    Serial << "Data: " << tm.Day << "/" << tm.Month << "/" << tmYearToCalendar(tm.Year);
    Serial << " - Ora: " << tm.Hour << ":" << tm.Minute << ":" << tm.Second << endl;
  } else {
    Serial.println("Errore lettura RTC");
  }
  delay(1000);
}
📘 Useful Functions of the Library
| Function | Description |
|---|---|
rtc.read(tm) |
Reads the date and time from the module |
rtc.write(tm) |
Sets the date and time |
tm.Year, tm.Month |
Access to individual date and time elements |
tmHour, tmMinute |
Direct access to hour/minutes |
CalendarYrToTm(anno) |
Conversion from calendar year to base year 1970 |
tmYearToCalendar(tm) |
Inverse conversion (useful for printing) |
⚠️ Practical Tips
- Do Not Set the Time on Every Startup: the code to set the time should be executed only once. After that, comment it out.
- Check the Battery: if the time resets, the CR2032 battery is dead or missing.
- Do Not Reverse the Pins: incorrect connections cause incorrect readings or failed communications.
- The precision of the DS1302 is good for general use, but for critical applications it is better to use the DS3231 (which has a temperature-compensated oscillator).
🎯 Typical Applications
- Digital clocks with display (LCD, OLED, 7-segment)
- Log data with timestamp (e.g., on SD cards)
- Alarms and automatic timers
- Home automation projects with scheduled events
- Timers for irrigation systems
🔄 Alternatives
| RTC Module | Accuracy | Battery | Communication | Notes |
|---|---|---|---|---|
| DS1302 | Average | CR2032 | 3 wires (Serial) | Economic, basic |
| DS1307 | Good | CR2032 | I2C | Most common |
| DS3231 | High | Included | I2C | High precision, temperature compensated |
📌 Conclusion
The DS1302 RTC module is an excellent choice for Arduino projects where it is necessary to keep track of time even when the microcontroller is off. It is economic, easy to use, and well-documented, although today it is often replaced by the more precise DS3231.
Perfect! I provide you with two practical extensions for the module DS1302 RTC with Arduino:
🔹 1. Display Date/Time on OLED I2C (128×64)
🧰 Required Components:
- Arduino UNO / Nano
- RTC DS1302 Module
- OLED Display 128×64 (driver SSD1306, I2C interface)
- Jumper Wires
🔧 Connection Diagram
| Component | Pin | Arduino |
|---|---|---|
| DS1302 | VCC, GND | 5V, GND |
| CLK | D6 | |
| I/O | D7 | |
| CE (RST) | D8 | |
| OLED | VCC, GND | 5V, GND |
| SDA | A4 | |
| SCL | A5 |
📦 Libraries to install:
- DS1302RTC – Paul Stoffregen
- Adafruit GFX Library
- Adafruit SSD1306
Open the Arduino IDE → Library Manager → Search and install all three.
💡 Example code with OLED:
#include <DS1302RTC.h>
#include <TimeLib.h>
#include <Wire.h>
#include <Adafruit_GFX.h>
#include <Adafruit_SSD1306.h>

#define SCREEN_WIDTH 128
#define SCREEN_HEIGHT 64
#define OLED_RESET -1

Adafruit_SSD1306 display(SCREEN_WIDTH, SCREEN_HEIGHT, &Wire, OLED_RESET);
DS1302RTC rtc(8, 7, 6); // CE, IO, SCLK

void setup() {
  Serial.begin(9600);
  display.begin(SSD1306_SWITCHCAPVCC, 0x3C);
  display.clearDisplay();
  display.setTextSize(2);
  display.setTextColor(WHITE);
}

void loop() {
  tmElements_t tm;
  if (rtc.read(tm)) {
    display.clearDisplay();
    display.setCursor(0, 0);

    display.printf("%02d:%02d:%02dn", tm.Hour, tm.Minute, tm.Second);
    display.setTextSize(1);
    display.setCursor(0, 40);
    display.printf("%02d/%02d/%04d", tm.Day, tm.Month, tmYearToCalendar(tm.Year));
    display.display();
  } else {
    display.clearDisplay();
    display.setCursor(0, 0);
    display.println("RTC ERROR");
    display.display();
  }
  delay(1000);
}
🔹 2. Logger on SD Card with Timestamp from DS1302
🧰 Components:
- Arduino UNO / Nano
- RTC DS1302
- SD card reader (with logic level adapter if needed)
- Formatted MicroSD card FAT32
🔧 SD Card Connection
| SD Card Reader | Arduino |
|---|---|
| CS | D10 |
| MOSI | D11 |
| MISO | D12 |
| SCK | D13 |
| VCC, GND | 5V, GND |
📦 Libraries to use:
- SD
- DS1302RTC
- TimeLib
💡 Example Code for Data Logging:
#include <SPI.h>
#include <SD.h>
#include <DS1302RTC.h>
#include <TimeLib.h>

const int chipSelect = 10;
DS1302RTC rtc(8, 7, 6); // CE, IO, SCLK

void setup() {
  Serial.begin(9600);
  SD.begin(chipSelect);
  if (!SD.begin(chipSelect)) {
    Serial.println("SD init failed!");
    return;
  }
  Serial.println("SD OK");
}

void loop() {
  tmElements_t tm;
  if (rtc.read(tm)) {
    File logFile = SD.open("log.txt", FILE_WRITE);
    if (logFile) {
      logFile.print(tmYearToCalendar(tm.Year));
      logFile.print("/");
      logFile.print(tm.Month);
      logFile.print("/");
      logFile.print(tm.Day);
      logFile.print(" ");
      logFile.print(tm.Hour);
      logFile.print(":");
      logFile.print(tm.Minute);
      logFile.print(":");
      logFile.println(tm.Second);
      logFile.close();
      Serial.println("Dati scritti su SD.");
    } else {
      Serial.println("Errore apertura log.txt");
    }
  }
  delay(5000); // Log ogni 5 secondi
}
✅ Additional Tips:
- You can combine OLED + SD + DS1302 in the same project if there are no pin conflicts.
- You can also log sensor data (e.g., temperature, humidity) to the string
logFile.print(). - Remember to format the SD in FAT32 and use simple files
.txt.
Tutorial: How to Use DS1302 RTC Module
The DS1302 module is a real-time clock (RTC) that maintains time and date even when the Arduino device is not powered. Ideal for projects requiring high temporal accuracy.
What you need
- Arduino Uno or compatible
- USB cable
- DS1302 RTC module
Steps
- Connect VCC to 5V on Arduino
- Connect GND to ground on Arduino
- Connect I/O to digital pin 7 on Arduino (or any other pin)
- Connect CE to digital pin 8 on Arduino (or any other pin)
- Connect RST to digital pin 9 on Arduino (or any other pin)
- Install the DS1302 RTC library in Arduino IDE
- Load the example sketch provided by the library
- Check that the time and date are correct
Example code
include <DS1302.h>

DS1302 rtc(7, 8, 9);

time_t now;

void setup() {
  Serial.begin(9600);
  rtc.adjust(DateTime(F(__DATE__), F(__TIME__))); // Imposta l'ora e la data corrente
}

void loop() {
  DateTime now = rtc.now();
  Serial.print(now.year(), DEC);
  printDigits(now.month());
  printDigits(now.day());
  printDigits(now.hour());
  printDigits(now.minute());
  printDigits(now.second());
  Serial.println();
  delay(1000); // Aggiorna ogni secondo
}

void printDigits(int digits) {
  Serial.print(digits / 10);
  Serial.print(digits % 10);
}
Mini project
Create a digital clock that displays the time and date on the Arduino serial monitor. Add a function to manually set the time and date.
Common mistakes
- Do not check connections before uploading the sketch
- Set the time without a battery, which can cause the time information to be lost when Arduino is turned off
- Use a pin incompatible for I/O, CE or RST
- Ignore the datasheet configuration of the module
Recommended accessories
- LCD display module 16×2
- CR1220 battery (for RTC power)
- Electronic relocker
- LED dot matrix display
Frequently asked questions
How can I set the time manually?
Use the ‘adjust()’ method of the DS1302 library to manually set the time and date.
Which Arduino pins can the DS1302 module use?
It can use any digital pin on Arduino, but make sure the connections are correct.
Reviews
There are no reviews yet.