 EN
 IT Italiano
 ES Español
 FR Français
 DE Deutsch
Description
Technical Specifications
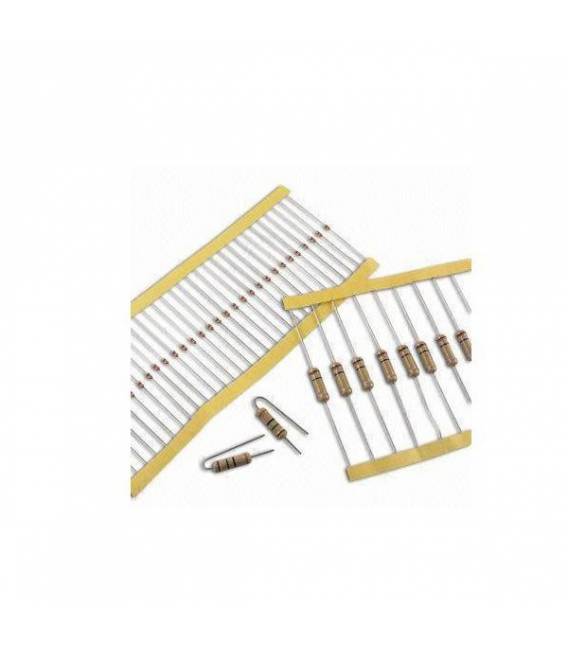
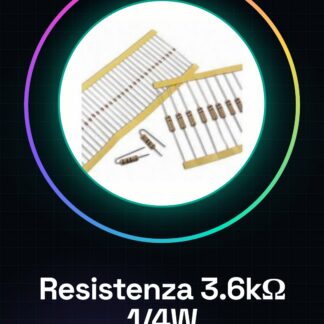
The 3.6kΩ resistor is a fundamental component for limiting the flow of electrical current in a circuit. This type of resistor is used to protect sensitive components such as LEDs or sensors, ensuring they do not exceed their current handling capacity. The 3.6kΩ resistor is suitable for projects that require current limiting in electronic circuits, such as those based on Arduino.
The 3.6kΩ resistor is available in a pack of 50 pieces, with a 5% tolerance and a maximum power rating of 1/4 watt. Its utility extends to various areas, such as prototyping, testing, and home automation projects.
To use this resistor, it is necessary to calculate the required resistance value for the circuit based on Ohm’s law and correctly connect the resistor to the Arduino pins or other circuit components.
Key Specifications
| Parameter | Value |
| Model | Resistance 3.6K ohm |
| Quantity | 50 pieces |
| Resistive Value | 3600 ohm |
| Tolerance | 5% |
| Maximum Power | 1/4 watt |
| Dimensions | N/D (see manufacturer’s datasheet) |
| Interface | N/D (see manufacturer’s datasheet) |
| Container | N/D (see manufacturer’s technical sheet) |
Installation and Usage
- Check the circuit’s operating voltage and calculate the required resistance value using Ohm’s Law.
- Identify the terminals of the resistor: there are no specific poles, you can connect the ends in any way.
- Connect one end of the resistor to a digital pin of the Arduino and the other end to GND using jumper wires.
- Write an Arduino sketch to read the value of the digital pin with the resistor connected.
- Test the circuit to verify that the resistor works correctly.
Compatibility and Requirements
- The 3.6kΩ resistor is compatible with Arduino Uno and other microcontroller-based systems.
- A jumper wire is required to connect the resistor to the Arduino pins.
- To use the resistor, a circuit requiring current limiting is necessary.
Limits and Important Notes
- The 3.6kΩ resistor is not designed for high-power applications.
- It is important to verify that the resistor meets the circuit’s voltage requirements.
- The resistor does not have specific poles, but it is important to connect it correctly to avoid errors.
- Ensure not to exceed the maximum power of 1/4 watt to prevent damage to the component.
Troubleshooting
The LED does not light up.
Probable cause: The resistor does not meet the circuit’s voltage requirements.
Solution: Check the resistor value and calculate the correct value using Ohm’s Law.
The resistor overheats.
Probable cause: The resistor exceeds the maximum power of 1/4 watt.
Solution: Replace the resistor with one of higher power.
The circuit does not work correctly.
Probable cause: The resistor is incorrectly connected.
Solution: Check that the resistor is correctly connected to the Arduino pins.
The value of the digital pin does not change.
Probable cause: The resistor is not correctly connected to the circuit.
Solution: Check the resistor connection and the Arduino code.
Use cases
Domestic lighting project
Objective: Adjust the intensity of an LED.
What is needed: 3.6kΩ resistor, Arduino Uno, LED.
Steps: 1) Calculate the resistance value needed to limit the LED current. 2) Connect the resistor between the Arduino digital pin and the LED. 3) Write an Arduino sketch to adjust the LED intensity. 4) Test the circuit to ensure the LED works correctly.
Expected result: The LED changes intensity based on the Arduino code.
Temperature control project
Objective: Adjust the temperature of a resistor.
Required: 3.6kΩ resistor, Arduino Uno, thermal resistor.
Steps: 1) Connect the resistor between the digital pin of the Arduino and the thermal resistor. 2) Write an Arduino sketch to regulate the temperature of the resistor. 3) Test the circuit to verify that the temperature of the resistor is adjustable.
Expected Result: The temperature of the resistor can be regulated based on the Arduino code.
Motors Control Project
Objective: Regulate the speed of a motor.
Required: 3.6kΩ resistor, Arduino Uno, motor.
Steps: 1) Connect the resistor between the digital pin of the Arduino and the motor. 2) Write an Arduino sketch to regulate the speed of the motor. 3) Test the circuit to verify that the speed of the motor is adjustable.
Expected Result: The speed of the motor can be regulated based on the Arduino code.
Fan Control Project
Objective: Adjust the speed of a fan.
What you need: 3.6kΩ resistor, Arduino Uno, fan.
Steps: 1) Connect the resistor between the digital pin of the Arduino and the fan. 2) Write an Arduino sketch to adjust the fan’s speed. 3) Test the circuit to verify that the fan’s speed is adjustable.
Expected result: The fan’s speed can be adjusted based on the Arduino code.
LED strip control project
Objective: Adjust the brightness of an LED strip.
What you need: 3.6kΩ resistor, Arduino Uno, LED strip.
Steps: 1) Connect the resistor between the digital pin of the Arduino and the LED strip. 2) Write an Arduino sketch to adjust the LED strip’s brightness. 3) Test the circuit to verify that the LED strip’s brightness is adjustable.
Expected result: The brightness of the LED strip can be adjusted based on the Arduino code.
Temperature Sensor Control Project
Objective: Adjust the reading of a temperature sensor.
What’s needed: 3.6kΩ resistor, Arduino Uno, temperature sensor.
Steps: 1) Connect the resistor between the digital pin of the Arduino and the temperature sensor. 2) Write an Arduino sketch to adjust the reading of the temperature sensor. 3) Test the circuit to verify that the temperature sensor reading is adjustable.
Expected result: The reading of the temperature sensor can be adjusted based on the Arduino code.
Light Sensor Control Project
Objective: Adjust the reading of a light sensor.
What’s needed: 3.6kΩ resistor, Arduino Uno, light sensor.
Steps: 1) Connect the resistor between the digital pin of the Arduino and the light sensor. 2) Write an Arduino sketch to adjust the reading of the light sensor. 3) Test the circuit to verify that the light sensor reading is adjustable.
Expected result: The light sensor reading can be adjusted based on the Arduino code.
Motion sensor control project
Objective: Adjust the reading of a motion sensor.
What you need: 3.6kΩ resistor, Arduino Uno, motion sensor.
Steps: 1) Connect the resistor between the digital pin of the Arduino and the motion sensor. 2) Write an Arduino sketch to adjust the reading of the motion sensor. 3) Test the circuit to verify that the motion sensor reading is adjustable.
Expected result: The motion sensor reading can be adjusted based on the Arduino code.
In the package
- 50 pieces
Complete the project
- 50 Pieces Resistance 1000 ohm 1k ohm 1/4w 1/4 w 5%: Needed for projects requiring resistors of different values.
- 50 Pieces Resistance, 10000 ohm, 10k, ohm 1/4w 1/4 w 5%, Arduino compatible resistors: Needed for projects requiring resistors of different values.
- 50 Pieces Resistance 100 ohm 1/4w 5%: Needed for projects requiring resistors of different values.
- 50 Pieces Resistance 220 ohm 1/4w 1/4 w 5%
- 50 Pieces Resistance 4.7K ohm 4700 ohm 1/4w 1/4 w 5%
Technical FAQ
What is the utility of this resistance?
The 3.6kΩ resistance limits the electric current in a circuit, protecting sensitive components such as LEDs or sensors.
How do I calculate the value of the resistance to use?
Use Ohm’s law: R = V / I where R is the resistance, V is the voltage and I is the current intensity.
Why doesn’t the LED light up?
The resistance does not meet the circuit’s voltage requirements. Check the resistance value and calculate the correct value using Ohm’s Law.
Why does the resistance overheat?
The resistance exceeds the maximum power rating of 1/4 watt. Replace the resistance with one of higher power rating.
Tutorial: How to use 3.6K ohm Resistance
Resistors are fundamental components for limiting the flow of electrical current in a circuit. This 3.6kΩ resistor is ideal for Arduino projects, sensors, or any other device that requires current limiting.
What you need
- Arduino Uno
- Jumper wire
Steps
- Check the operating voltage of your circuit and calculate the required resistance value using Ohm’s Law.
- Identify the terminals of the resistor: there are no specific terminals, you can connect the ends in any way.
- Connect one end of the resistor to a digital pin on the Arduino and the other end to GND using jumper wires.
- Write an Arduino sketch to read the value of the digital pin with the resistor connected.
Mini project
Create a simple illuminated control interface using an LED and the 3.6kΩ resistor as a current limiter.
Common mistakes
- Use a resistor that does not meet the circuit voltage requirements.
- Connect the resistor to GND without going through the Arduino pin.
Recommended accessories
- LED
- Jumper wire
Frequently asked questions
What is the purpose of this resistor?
Limits the electrical current in a circuit, protecting sensitive components such as LEDs or sensors.
How do I calculate the value of the resistor to use?
Use Ohm’s Law: R = V / I where R is the resistance, V is the voltage, and I is the current intensity. Check the datasheet for precise specifications.
Reviews
There are no reviews yet.