 EN
 IT Italiano
 ES Español
 FR Français
 DE Deutsch
Description
What it is
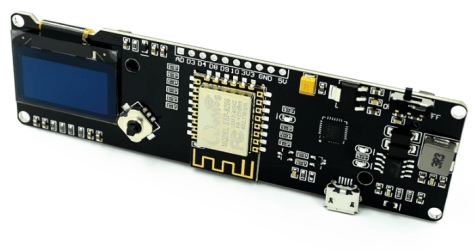
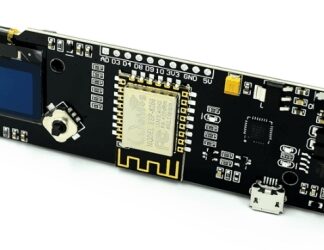
The ESP8266 for NODEMCU with extended temperature and humidity board featuring a 0.96 OLED display is an integrated module that allows for real-time monitoring and displaying of temperature and humidity. The module includes a 0.96-inch OLED display for data visualization.
Features
- ESP8266 Module for NODEMCU
- 0.96-inch OLED Display
- Temperature and Humidity Monitoring
- Compatible with Arduino
- Wi-Fi Connectivity
What it is for
This module is ideal for creating Wi-Fi weather stations that monitor temperature and humidity in real-time. It is suitable for beginners and intermediates and can be used indoors or outdoors. It is compatible with Arduino and can be integrated into basic electronics projects.
Tutorial: How to Use ESP8266 for NODEMCU with 0.96 OLED
This module allows you to create Wi-Fi weather stations indoors or outdoors. Ideal for beginners and intermediates.
What you need
- ESP8266 for NODEMCU with 0.96 OLED
- Arduino IDE
- USB cable
- Temperature and humidity sensors
- Computer with Windows, MacOS, or Linux operating system
Steps
- 1. Download and install the Arduino IDE.
- 2. Connect the ESP8266 to the computer with the USB cable.
- 3. Check the datasheet for pin connections.
- 4. Load the example code onto the Arduino IDE.
- 5. Configure the WiFi connection on the module.
- 6. Add the pins for the temperature and humidity sensor.
- 7. Load the code and check the output on the OLED screen.
- 8. Configure the module to send data to an MQTT server
Example code
```
#include <ESP8266WiFi.h>
#include <PubSubClient.h>

const char* ssid = "TUO_SSID";
const char* password = "TUO_PWD";

WiFiClient wifiClient;
PubSubClient client(wifiClient);

void connectWiFi() {
  WiFi.begin(ssid, password);
  while (WiFi.status() != WL_CONNECTED) {
    delay(1000);
    Serial.println("Connecting to WiFi...");
  }
  Serial.println("Connected to WiFi");
}

void setup() {
  connectWiFi();
  client.connect("meteo");
}

void loop() {
  client.loop();
}
```
Mini project
Create a WiFi weather station to monitor temperature and humidity in real-time on the OLED screen.
Common mistakes
- Fail to configure the WiFi connection correctly.
- Fail to connect the sensor pins correctly.
- Forget to install the necessary libraries.
- Configure the module to send data to an MQTT server incorrectly.
Recommended accessories
- Temperature and humidity sensors
- USB cable
- Weather monitoring system
- WiFi connection module
Frequently asked questions
How can I check the pin connection?
Check the datasheet or consult the manufacturer’s connection tutorial.
Does the module work with batteries?
Yes, but for stable use we recommend using a USB power supply.
Can I use this module to control the lights at home?
Yes, but add a relay or another device to control the electrical consumption.
Reviews
There are no reviews yet.