 EN
 IT Italiano
 ES Español
 FR Français
 DE Deutsch
Description
What it is
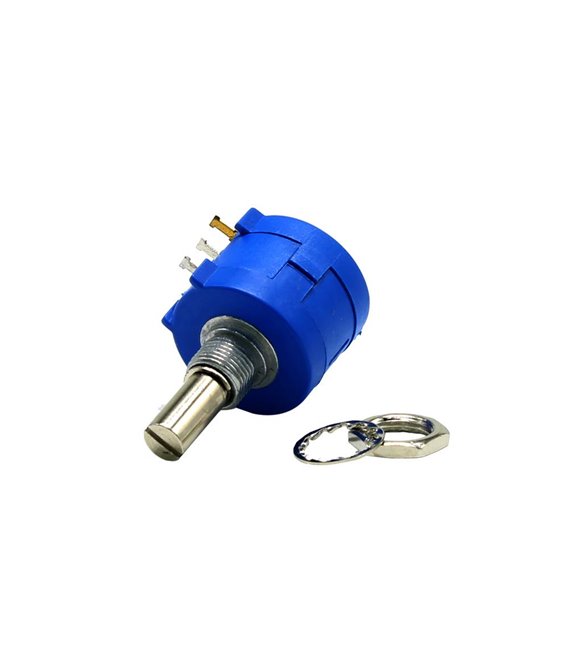
The 100Kohm 100K 3590S-2-104L 3590S precision multi-turn axial potentiometer is an electronic component used to adjust the resistance value in an electronic circuit. This type of potentiometer is known for its precision and stability, making it suitable for applications that require accurate variable adjustment.
Features
- Type: Precision Multi-Turn Axial Potentiometer
- Resistance Value: 100Kohm
- Model: 3590S-2-104L
- SKU: ARD0014340
What it is for
This potentiometer is ideal for Arduino and electronic projects that require accurate variable adjustment such as volume, brightness, or other analog functions. It is suitable for beginner and intermediate makers who want to create projects like LED dimmers or other devices that require precise resistance control.
Tutorial: How to Use 100Kohm 3590S Axial Potentiometer
The 3590S axial potentiometer is an electronic component used to adjust the resistance value in a circuit. It is ideal for beginner and intermediate makers who want to control variables such as volume or brightness in Arduino projects.
What you need
- Arduino Uno
- Connecting wire
- Resistor sequence
- Multimeter
Steps
- Connect the potentiometer to the circuit using connecting wires.
- Check the resistance between the central terminal and one lateral terminal using a multimeter.
- Connect the potentiometer pins to the microcontroller (GND, VCC, A0).
- Write an Arduino sketch to read the potentiometer value.
- Adjust the potentiometer and observe how the displayed value changes.
- Check the datasheet for further information on technical specifications.
Example code
int potPin = A0;
int potVal;

void setup() {
  Serial.begin(9600);
}

void loop() {
  potVal = analogRead(potPin);
  Serial.println(potVal);
}
Mini project
Create a dimmer for an LED using the potentiometer to adjust the brightness.
Common mistakes
- Connect the potentiometer to the circuit without first checking the resistance.
- Do not read the potentiometer value correctly in Arduino.
- Use the potentiometer without first understanding its polarity.
- Do not verify the potentiometer specifications on the datasheet.
Recommended accessories
- Arduino Uno
- Resistance sequence
- Multimeter
- Various LEDs
Frequently asked questions
How do you connect a potentiometer?
Connect the two lateral terminals to GND and VCC respectively, and the central terminal to the microcontroller’s analog pin.
What is the difference between a potentiometer and a trimmer?
A potentiometer is a rotary component, while a trimmer is a fixed component with a small screw.

Reviews
There are no reviews yet.